
Introduction to Apollo Notes

Welcome to Apollo Notes, we are glad to have you on board!
Apollo Notes is an AI-powered voice dictation tool that can turn your rough voice notes into high-quality clinical documentation. It’s designed to save time by quickly generating progress notes, treatment plans, intake notes, and more.
Unlike traditional voice dictation software, Apollo Notes understands the context behind what you are saying. It automatically removes any mistakes (i.e. “umms” and “ahhs”), and can convert natural speech into high-quality clinical writing.
Apollo Notes does not currently support live recording during a therapy session. Instead, we are focused on providing a superior voice dictation experience for the therapist once the session is over.
In this tutorial, you’ll familiarize yourself with the onboarding process, set up your recording environment, and create your first progress note.
Onboarding
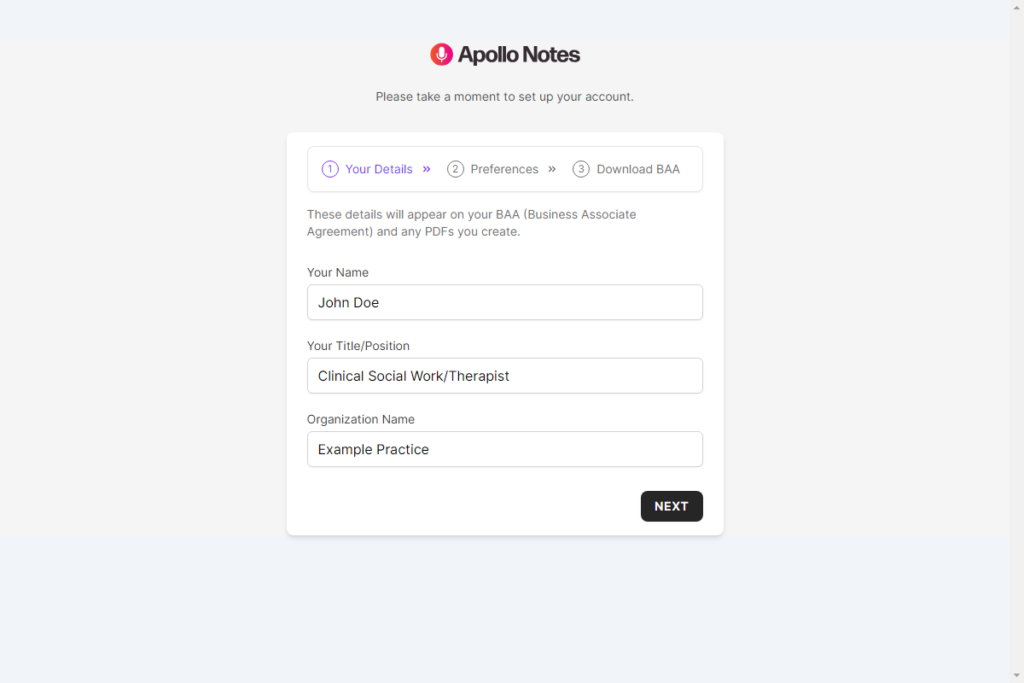
When you first sign in, you’ll see our onboarding page. This will help get you up and running in Apollo Notes. You’ll need to enter some basic details such as name, title, and organization name.
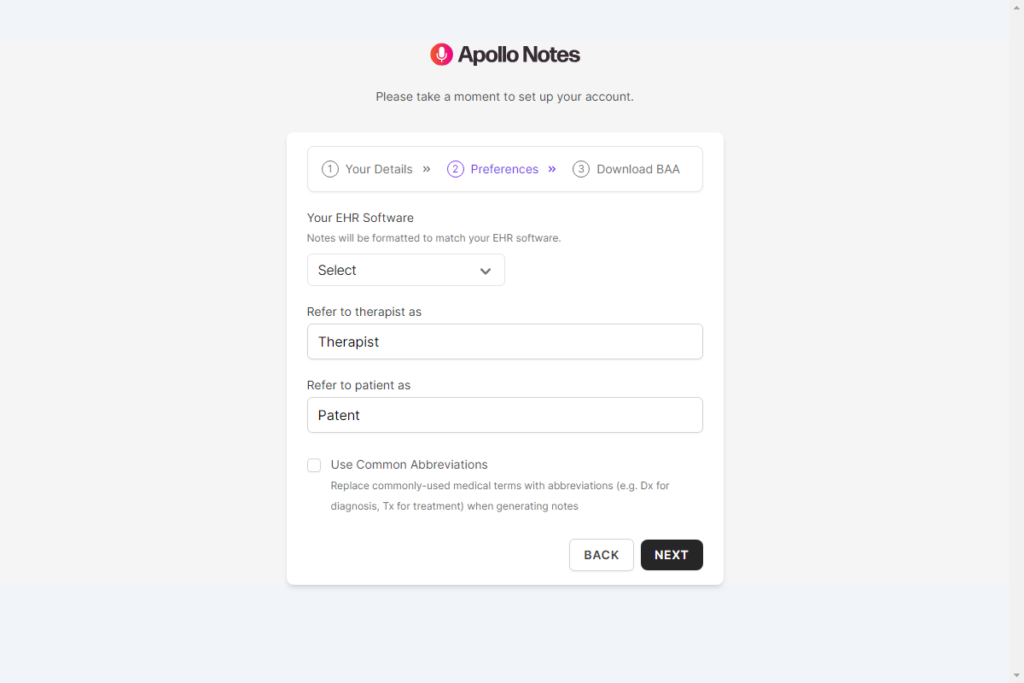
On the next screen, you can select your EHR software, along with your preferred way to reference ‘therapist’ and ‘patient’. This will be used to help customize the notes you generate.
You can also choose to enable common abbreviations, which replace medical terms with their common abbreviation. Enabling this feature will automatically replace the following terms:
- Treatment > Tx
- Prescription > Rx
- Diagnosis > Dx
- Symptom > Sx
- History > Hx
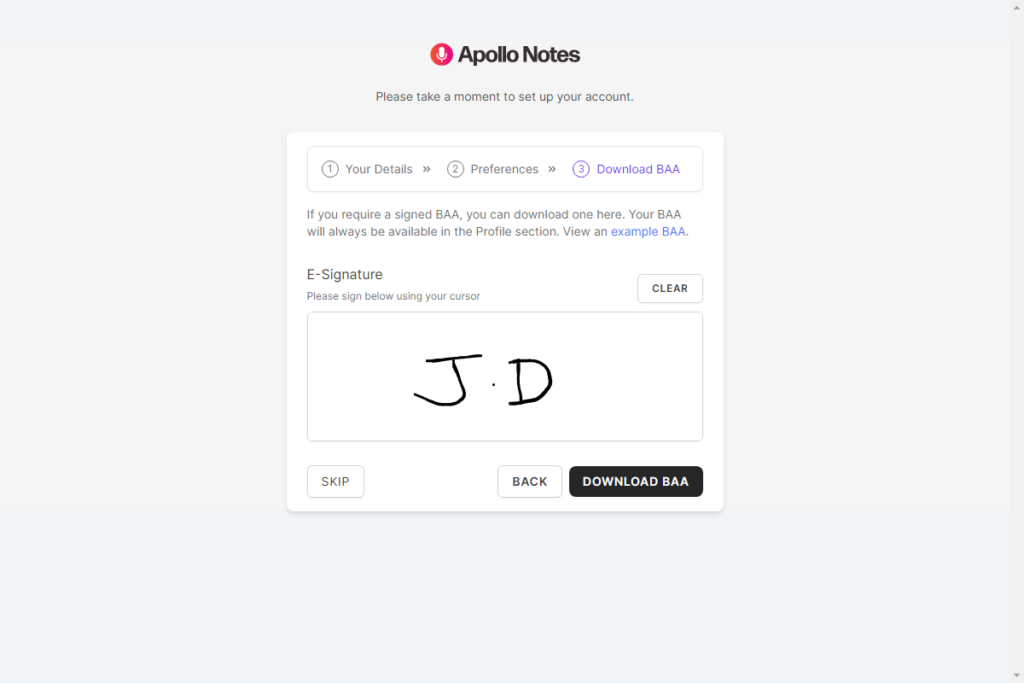
On the last onboarding screen, you can choose to sign and download a BAA (Business Associate Agreement) for your organization.
Setting up your recording environment
For most cases, you should be able to use the inbuilt microphone on your phone or laptop to record your speech. If you are encountering problems with the speech recognition, we recommend improving sound quality by trying these steps:
- Choose a quiet room where external noises (traffic, conversations, etc.) are minimized. Smaller rooms can help in containing sound and avoiding echos.
- A good quality external microphone can improve speech recognition accuracy. Position the microphone about a fist’s distance away from the mouth. If the microphone is too close, the recording may become distorted.
- In the volume mixer, adjust the microphone input levels so speech is clear without peaking or distorting.
Creating your first note
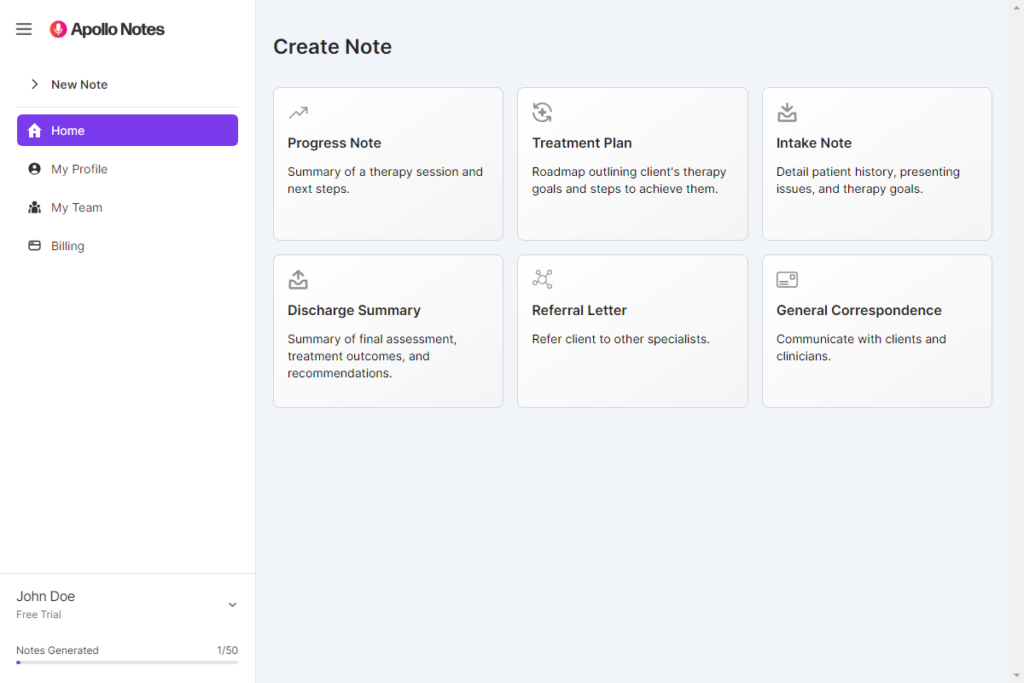
Once onboarding is complete, you’ll be redirected to the Dashboard view. From here you can choose from the following note types:
- Progress Note
- Treatment Plan
- Intake Note
- Discharge Summary
- Referral Letter
- General Correspondence
These note types are also available for quick access in the navigation menu on the left.
Let’s begin by selecting “Progress Note” from the Dashboard.
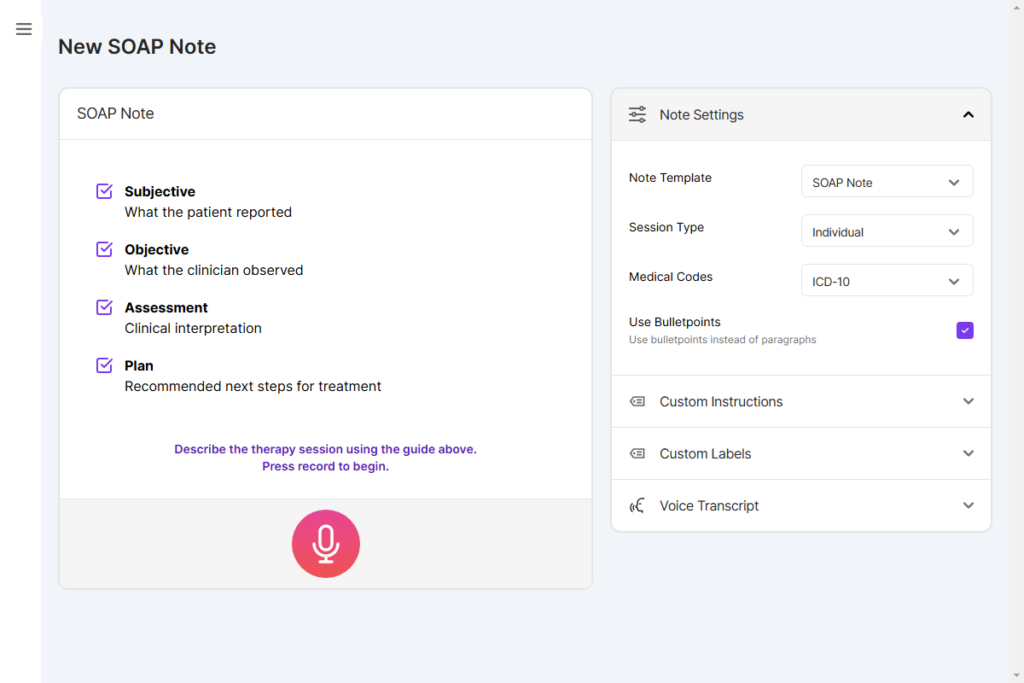
On the left is a guide for your chosen template, which you can use while recording your note. On the right are your settings, which you can use to customize the note that will be generated. The panels have the following functions:
- Note Template: You can choose from SOAP, DAP, or BIRP note types.
- Session Type: Choose from Individual, Couple or Group note types.
- Medical Codes: The AI will try to classify medical codes based on your input. You can choose from ICD-10, ICD-11 or DSM-5.
- Use Bulletpoints: Enabling this will use bulletpoints instead of paragraphs (narrative style).
- Custom Instructions: You can provide additional instructions for the AI to follow when generating your note. For example: “After the ‘Plan’ heading, add a heading named ‘Interventions’”. Please note that adding too many instructions may confuse the AI and lead to inaccurate results.
- Custom Labels: You can customize how the therapist and patient are referred to in the generated note. This is set to “Therapist” and “Patient” by default.
- Use Common Abbreviations: Enable common abbreviations, replacing medical terms with their common abbreviation (e.g. Dx for diagnosis, Tx for treatment).
- Voice Transcript: A live transcript will be displayed here when you begin voice recording. If you make a mistake, you can correct yourself and the system will adjust the note later.
Once you’ve configured these settings, click the Microphone icon to begin recording your note.
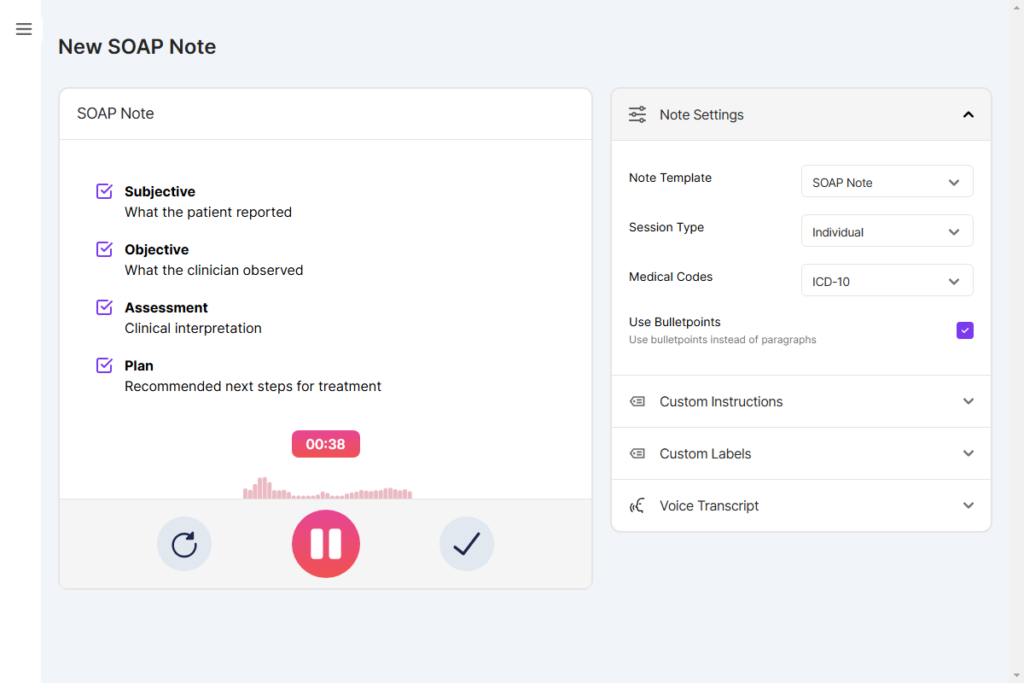
An audio visualizer will be displayed to show the microphone recording levels in realtime. Above that, a timer is shown. Below that contains the following buttons:
- Restart Recording: This will clear anything has been recorded so far and start again from scratch.
- Pause Recording: This will pause the recording so you can come back to it later.
- Finish Recording: This marks the recording as complete. Your note will start generating when this is clicked.
You can also view a live transcript of your recording by clicking ‘Voice Transcript’. This is hidden by default to help avoid any distraction.
Editing your note
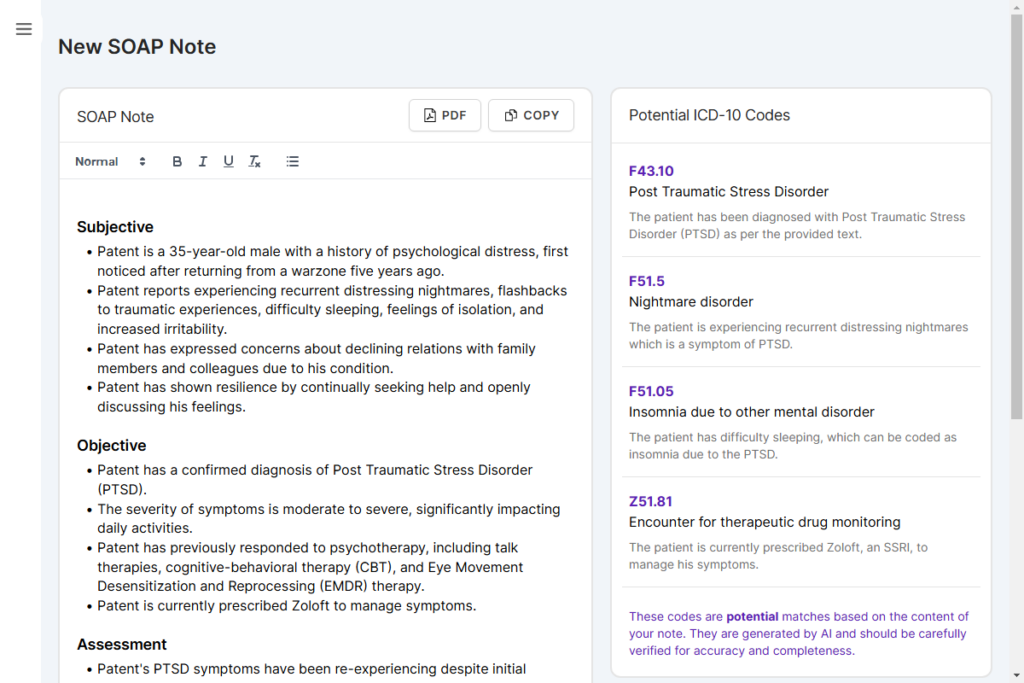
Once your note has been generated, you’ll be able to review and make changes. Your note is on the left, inside a rich-text editor that can format your note using headings, bulletpoints, etc. You can also use the buttons at the top of the editor to copy the text to the clipboard, or generate a PDF to keep a local copy.
On the right are medical code suggestions, based on your voice recording.
From here, you can copy and paste the edited note into your EHR software.
Your notes are not saved on our servers, so once you navigate away from this page, it will disappear forever.
Remember to thoroughly review the details generated on this page. We are constantly improving accuracy, however the AI does occasionally make mistakes, so it’s vital to ensure the information you add to your EHR is correct.
Conclusion
You should now be familiar with the basics of Apollo Notes. You’ve set up your account, your recording environment, and created your first note. You’re now ready to start writing documentation and saving precious time!
If you have any questions or need help getting started, please don’t hesitate to contact us.